
My tutorials are a guideline only, feel free to adjust your creation.
Materials needed
A tube: I used one from ©Janna Prosvirina @ www.digitalartheaven.com
Filters:
Mura's Meister: Copies & Perspective Tiling
Xero: Fritillary
Graphics Plus: Cross shadow
AAAFrames: Foto frame
Let's begin:
New image 600x500 transparant
Copy your tube and paste as a new layer
Mura's meister Copies, wallpaper rotate, default settings
Crop your whole image.
Adjust, blur, motion blur --> Angle 45, strength 100%
Repeat 2 times
Effects, edge effects, enhance more
Duplicate this layer.
Image, mirror.
Change the opacity of this layer to 50%
Merge layers down. Rename this BG layer
Duplicate this layer
Effects, Xero Fritillary
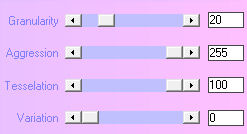
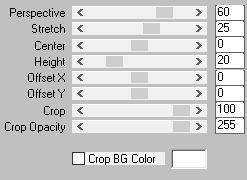
Effects, Mura's Meister: Perspective Tiling
Rename this layer Tiling
Activate BG layer in your layer palette
Effects, Graphics Plus, Cross shadow, default settings
Copy your tube and paste as a new layer, Move to the left
Set the blend mode to overlay and opacity to 70%
Merge down.
Paste your tube again as a new layer
Image, mirror, move to the right and resize to your liking.
Add drop shadow to your liking.
Activate Tiling layer.
With your magic wand click on the transparant part of your layer
Selections, invert
Go to your tube layer and hit delete.
Select none.
Layers, arrange, move up.
Crop your whole image.
Duplicate your tube layer.
Image, flip.
Move this layer down until it alligns with the bottom of the tag.
Use the arrow keys on your keyboard for more controle.
With your deform tool, grab the middle top point and drag it down until you reach the beginning of the tiling layer.
Adjust, blur gaussian blur, 2.00
Move this layer below your tube layer.
Set the blend mode to overlay.
Layers, merge visible.
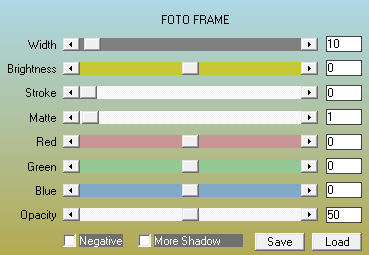
Effects, AAA Frames, Foto frame
 RSS Feed
